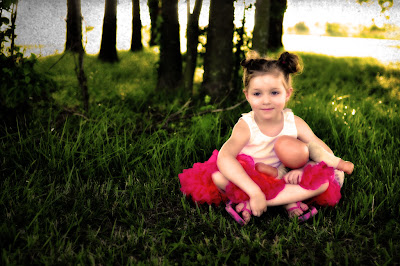
Not wanting to taint any creative juices, I opted to not view anyone else's submissions until mine was complete. The few I've had a chance to look through since all seemed to trend toward the vintage, desaturated look and honestly, that was the direction I headed at first too. Apparently this photo says "make me vintage-esque." In the end however, I went the other direction and pushed the saturation, added some glow and warmed the whole thing up a touch.
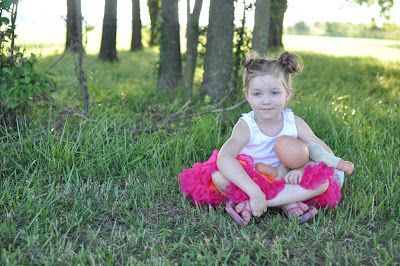
Original image:
My "fixed" version:
I opted to just stick with the tools native to CS3 since they suggested including a tutorial. Photoshop has so much available right within the program, I think that a lot of people overlook what is possible without the use of third party plugins. This was just a couple copies of the original image and a couple quick blending mode and transparency changes with a free brush texture over top of it to created the vignette. In total, there are three image layers and three adjustment layers.
On the bottom of the layer stack is the untouched original image. (It's always best to keep the original and screw up... I mean "work on" copies.)
Above that is a copy of the image that I added a gaussian blur to, with a radius of 3.9 pixels (different values will be needed for different pictures). This will be the base of our glow effect. The blending mode was changed to "Overlay" and the transparency set at 70% (again, different picture, different settings. the technique is the same though).
Above the copy layer is where the glow magic really happens. I added a "Levels" layer style and linked it so that it affects only the blurred layer. On the adjustment layer, I tweaked only the right-most slider, pulling it down to 207 to bring in a bit of a glow to the highlights of the image. (To link the layers, I used a trick that I didn't learn until years into my Photoshopping forays. Make sure that the adjustment layer is directly above the layer that you want to be effected by it, then hold down ALT and click on the line in between those two layers in the layer window. Voila! The upper adjustment layer now ignores all the other layers in your project and only changes what's on the layer that it's linked to.)
Another "Levels" adjustment layer went on top of that, left unlinked so as to affect the entire image. The left-most slider (the black point) was brought up to 61, the mid-point was brought up to 0.48 and the right-most slider (the white point) was brought down to 250. This really richened the green of the grass and pushed the whites to be a bit brighter.
At this point, the image felt a little too cold. I added a "Photo Filter" adjustment layer (again, unlinked) with the Warming Filter 85 setting at a density of 82%. No more frostbite!
Finally, I added a vignette with a simple click of a paint brush. I a brush from the collection "Old Paper Brushes III" by lailomeiel over at deviantart.com. I resized the brush to encompass the entire page, flipped it on the "Y" axis and clicked once. I set the opacity to 58% and called the whole thing done.
All in all, I'm pretty happy with my first Fix-It-Friday, even though the actual submission isn't happening until about 4am on Saturday. Maybe next week I'll have a chance to start sooner and make it all happen on Friday like it's supposed to!
4 comments:
Very nice!! I like the saturation of it! Thanks for playing along!
you played.... yay!!!!
Great job, i like it!
Thank you!
Post a Comment